The Kissingen Terrain Board: Making a 6mm Miniature Battlefield by Bruce Weigle Appeared in VaeVictis Hors-Serie No 12, December 2009, and Wargames Illustrated No WI329, March 2014
Unlike gaming in the larger scales, where beautifully painted figures are often the aesthetic focus of the game, the visual attraction of 6mm gaming must usually be the terrain board. The smaller figure size also enables the resourceful gamer to create terrain that is much more historically accurate and less abstract than with larger scales. This article will explain one method of building such terrain, using a board for the 1866 Battle of Kissingen as an example. This small engagement (between one Prussian and three Bavarian divisions) was fought during Prussia’s “Main campaign” in western Germany, and is one of 14 that are featured in the “1866” miniatures rules set.
While modeling unique geography can be time consuming, the results usually justify the effort — and the pleasure of playing a game on authentic and accurately detailed terrain can give the gamer a new appreciation of the difficulties faced by his historical counterpart. Premade terrain boards are excellent for use at conventions, incidentally, where set up time is reduced to just a few minutes. All the buildings, trees and figures and other material are already on the board! Over the past 17 years I have built 26 large game boards of this type for my “1870” and “1859/1864” games; all were 1:4000 scale (2.5cm = 100m), and all presented their own engineering and artistic challenges. As always, acquiring reliable contemporary and modern maps – as well as other source material describing the terrain and the battle — is the first consideration. My sketch map was based on a modern 1:50,000 scale topographic map and the Prussian and Bavarian General Staff histories’ maps. Additional details were gleaned from contemporary artwork, a visit to the area (now Bad Kissingen, in the Lower Franconia region of Bavaria) and from the ever-useful GoogleEarth site. A 1 kilometer square grid was superimposed on the sketch map and this was used throughout the terrain board making process.
The dimensions of this board (built in two pieces or “sections” for ease of transportation, handling, and storage) were about 165cm on a side, or about 6.5 scale kilometers square; this was more than enough territory for the forces to maneuver freely. Although it was designed in scale with my 6mm armies, the board could easily accommodate 10 or 15mm figures, with larger buildings and trees; the ground scale would remain the same.
Terrain Board Making Illustrations
Illo 1: The sketch map from the draft “1866” rules booklet (without the 1 km grid) shows all the terrain details and board elevations to be used in making the terrain board. The armies are shown in the positions they occupy at the game’s beginning, about 0900 on 10 July 1866.
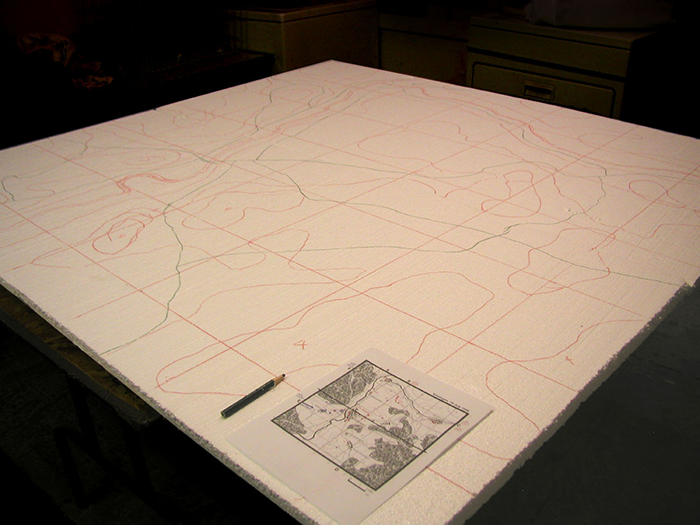
Illo 2: The primary material used is white styrofoam insulation board, obtained from a local home improvement store. The base layer should be at least 4cm thick, even if two thin sheets must be laminated together. The terrain board is shown here marked with the same 1 km grid as used on the working map, together with the drawn locations of terrain features, roads, and rivers.
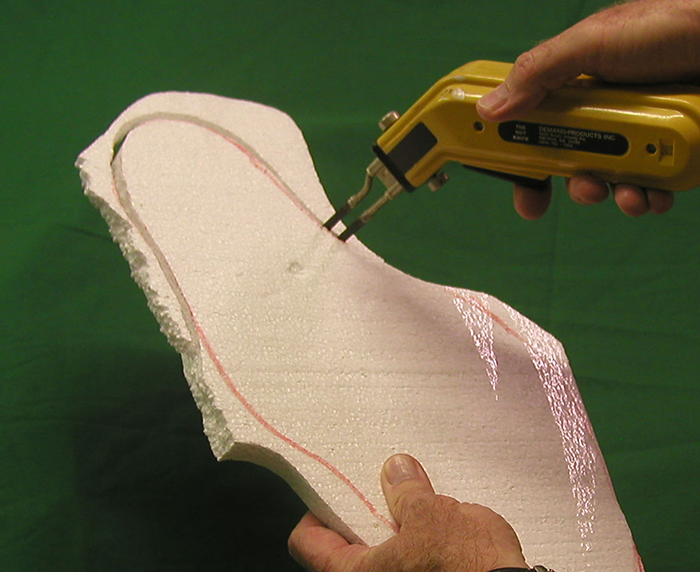
Illos 3 & 4: Layers of elevation corresponding to those marked on the base boards were marked out on additional pieces of Styrofoam and cut out using a professional quality “hot knife”. The edges were then beveled prior to gluing them to the base board.
Illo 5: Using common white glue, the terrain pieces are glued in place on the base layer. Straight pins keep the pieces immobile while the glue dries but are usually removed before the hillsides are shaped further with the hot knife.
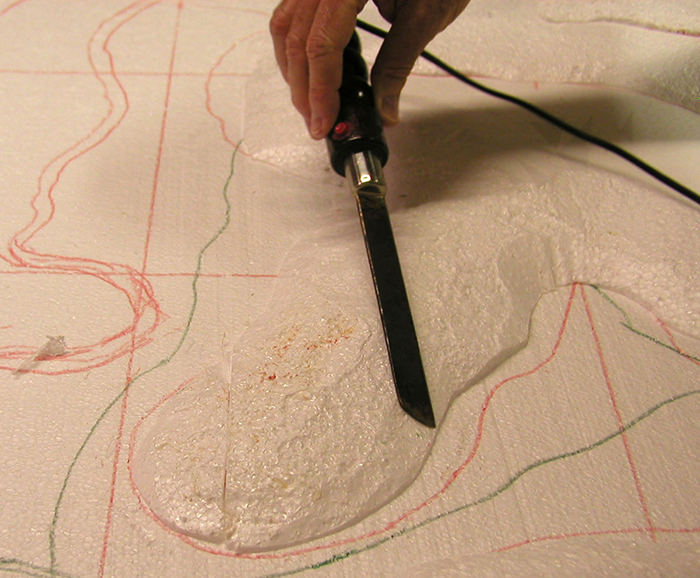
Illo 6: After the glue has dried (usually about 24 hours), a heavy bladed hobby hot knife is used to smooth and shape the Styrofoam terrain pieces realistically.
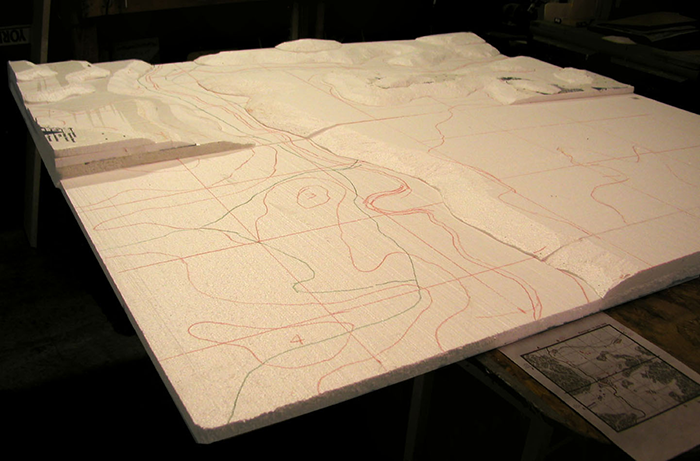
Illo 7: . This is the board about ¾ of the way through the “terrain forming” process. Notice that the red grid has been marked on each successive layer of Styrofoam.
Illos 8&9: Roads are melted into the hillsides as necessary, and the rivers are now cut and melted into the base layer – but never more than about 1 cm deep, as to not weaken the board.
Illo 10: Once all the Styrofoam has been glued and shaped, the board is ready for its fabric covering. The first layer (of felt) serves to soften the roughness of the cut and melted Styrofoam, and provides a good surface onto which the second layer (100% cotton double knit fabric) is glued. The cotton layer is ideal for painting all surface detail, by paintbrush and airbrush. It is dyed a light tan color which, I’ve found, is the best surface color for terrain painting.
Illo 11: One board section at a time is first covered with a rectangular piece of felt, which is secured across the width of the section by a line of straight pins. The felt is folded back along the line of pins, and both the underside of the fabric and the Styrofoam is generously coated with a spray adhesive (purchased from an art supply- or home improvement store). I generally use one aerosol spray can (about 300g) per board section, for both layers of fabric.
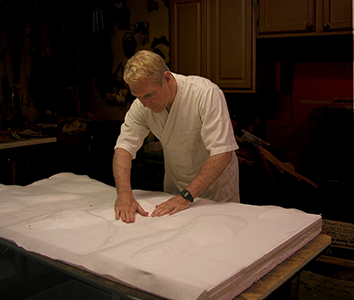
Illos 12&13: In a few minutes, once the adhesive is tacky, the felt is carefully folded back onto the Styrofoam surface so that the two sprayed surfaces are in contact. Working from the center of the section outwards, the felt is gently patted and smoothed into place over the Styrofoam terrain until all elevations and declivities (including riverbeds) are closely covered. The felt is then trimmed along the upper edges of the board so that only the top is felt-covered. The other half of the felt piece is attached to the board section in the same manner, and the line of pins is removed. The whole process is then repeated with the cotton layer, which is large enough to cover the sides of the game board as well. Great care must be used when folding the thin cotton layer onto the felt surface after both have been sprayed, to avoid the sticky underside of the cotton touching itself. This is a procedure sometimes best done by two people. Likewise, the smoothing process cannot be rushed, or difficult to eradicate wrinkles could result.
Illo 14: The riverbeds must be waterproofed before the “rivers” are poured, so they are coated with a spackling compound (from the home improvement store again) and left to dry.
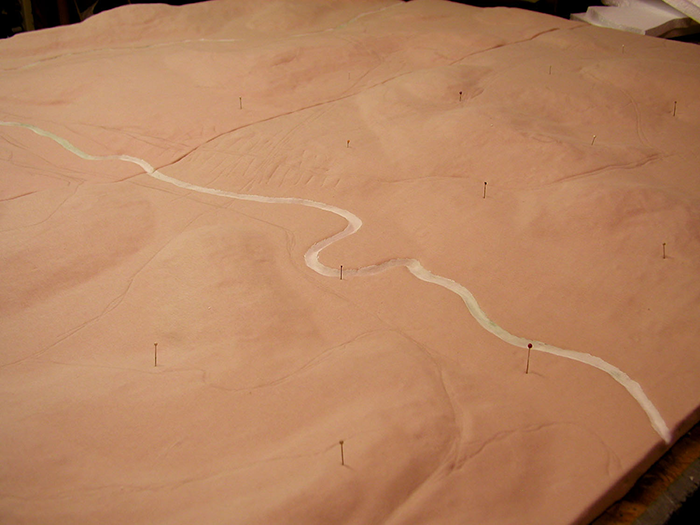
Illo 15: The outlines of all surface detail – the roads, woods, towns, fields, etc — are sketched on the cotton with a dull pencil. The everuseful straight pins mark the intersections of the map’s 1 km grid for orientation.
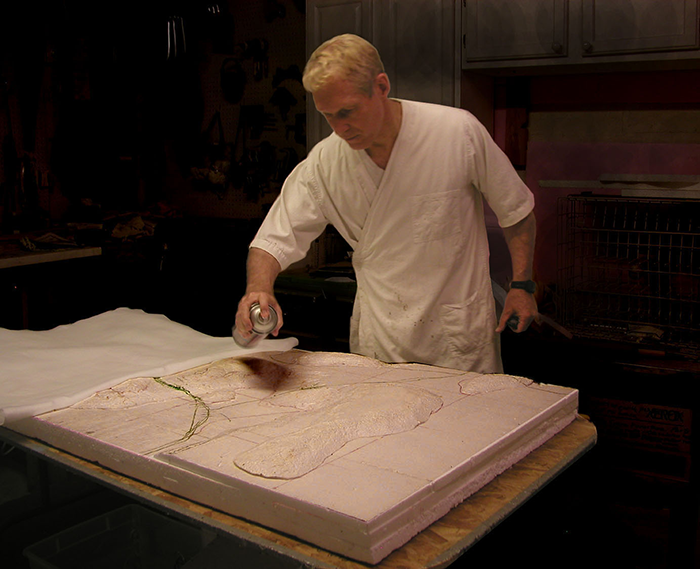
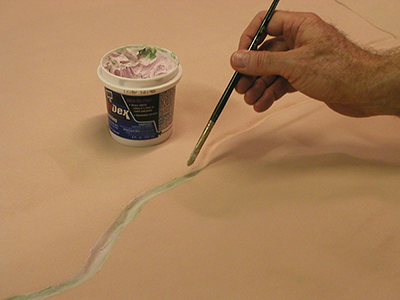
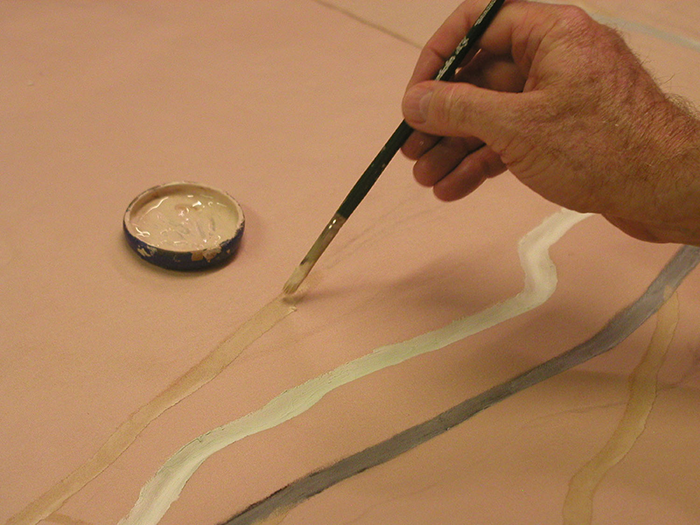
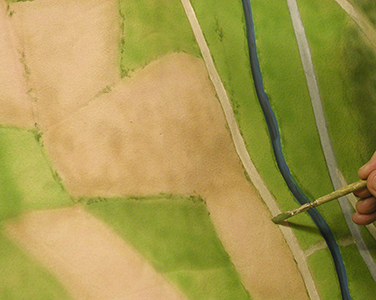
Illo 16: Using hobby acrylic paints from the local craft store, the penciled roads are given a preliminary coat of paint to definitively mark their location. This will also provide a hard surface for the second coat, applied after the fields and woods are airbrushed.
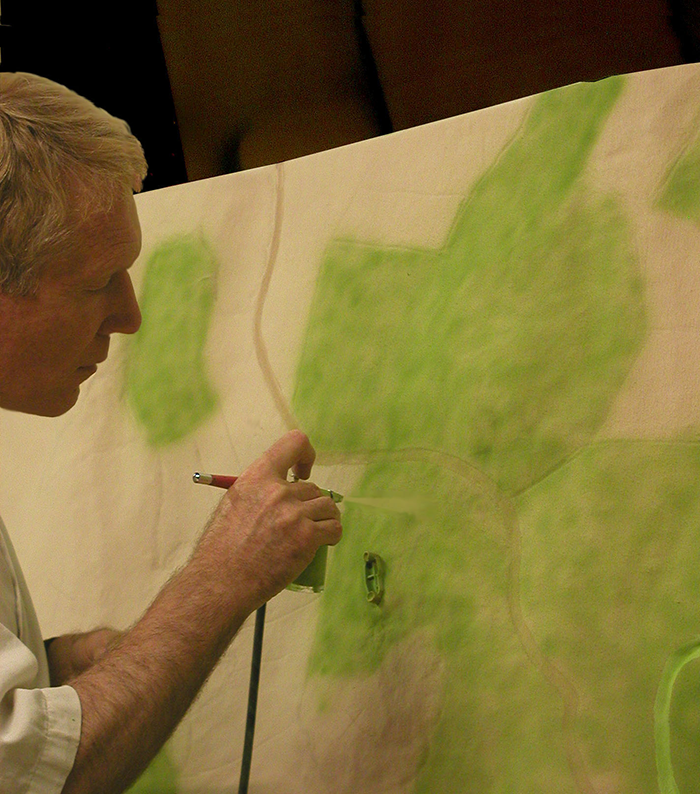
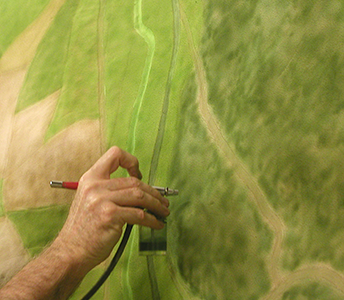
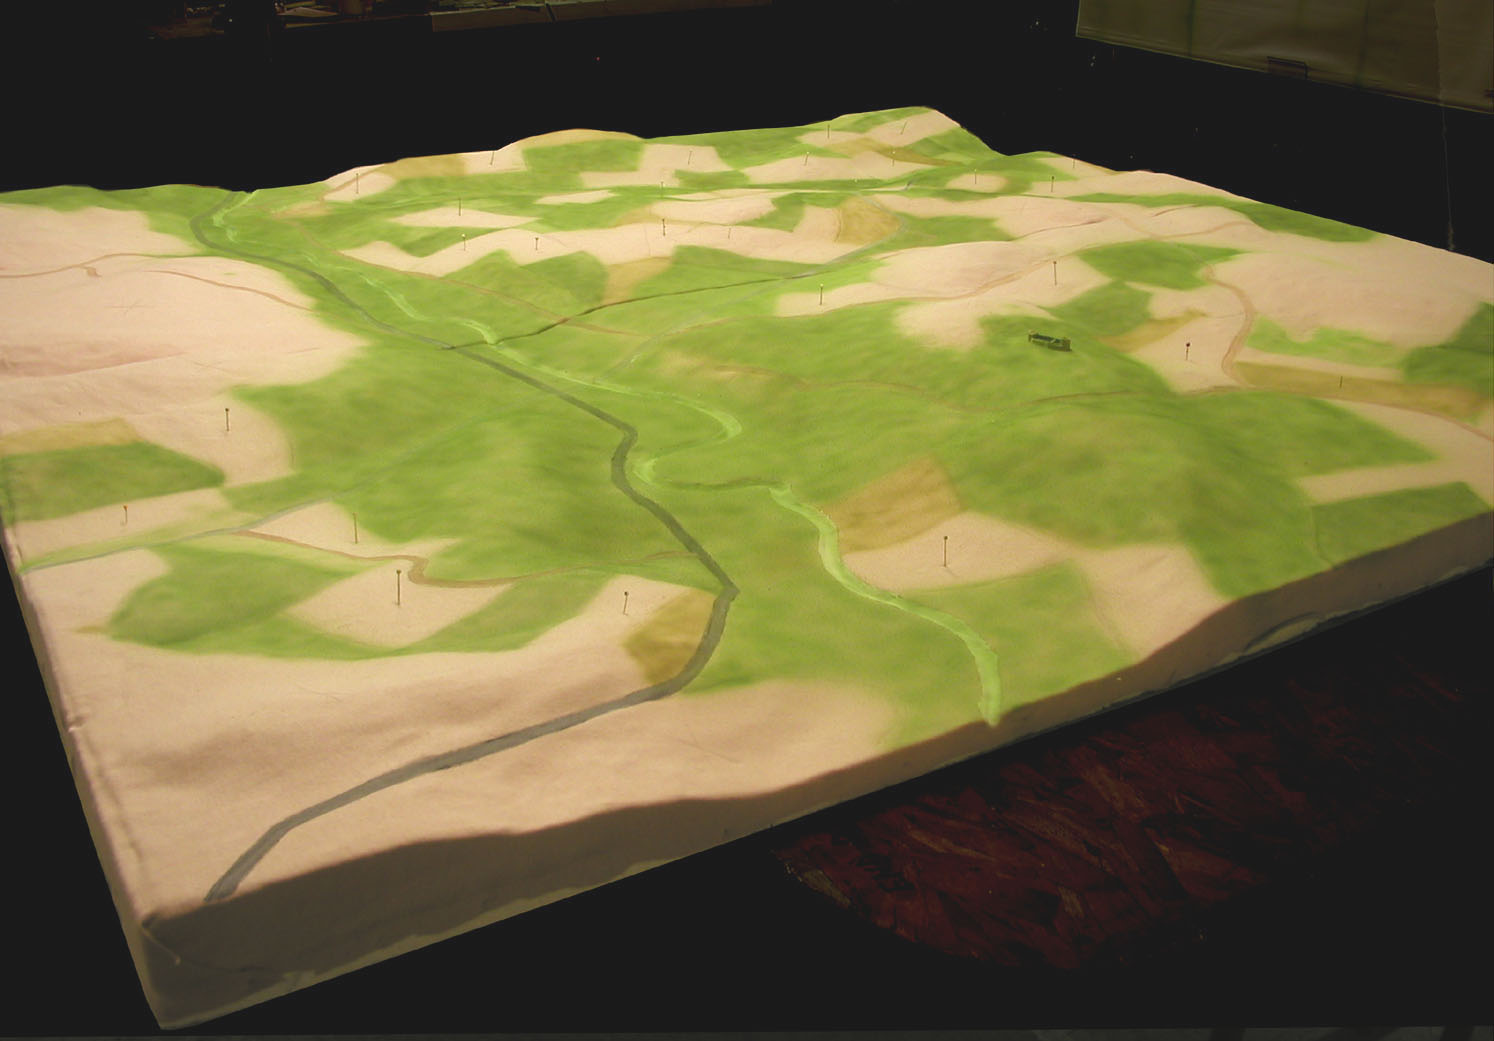
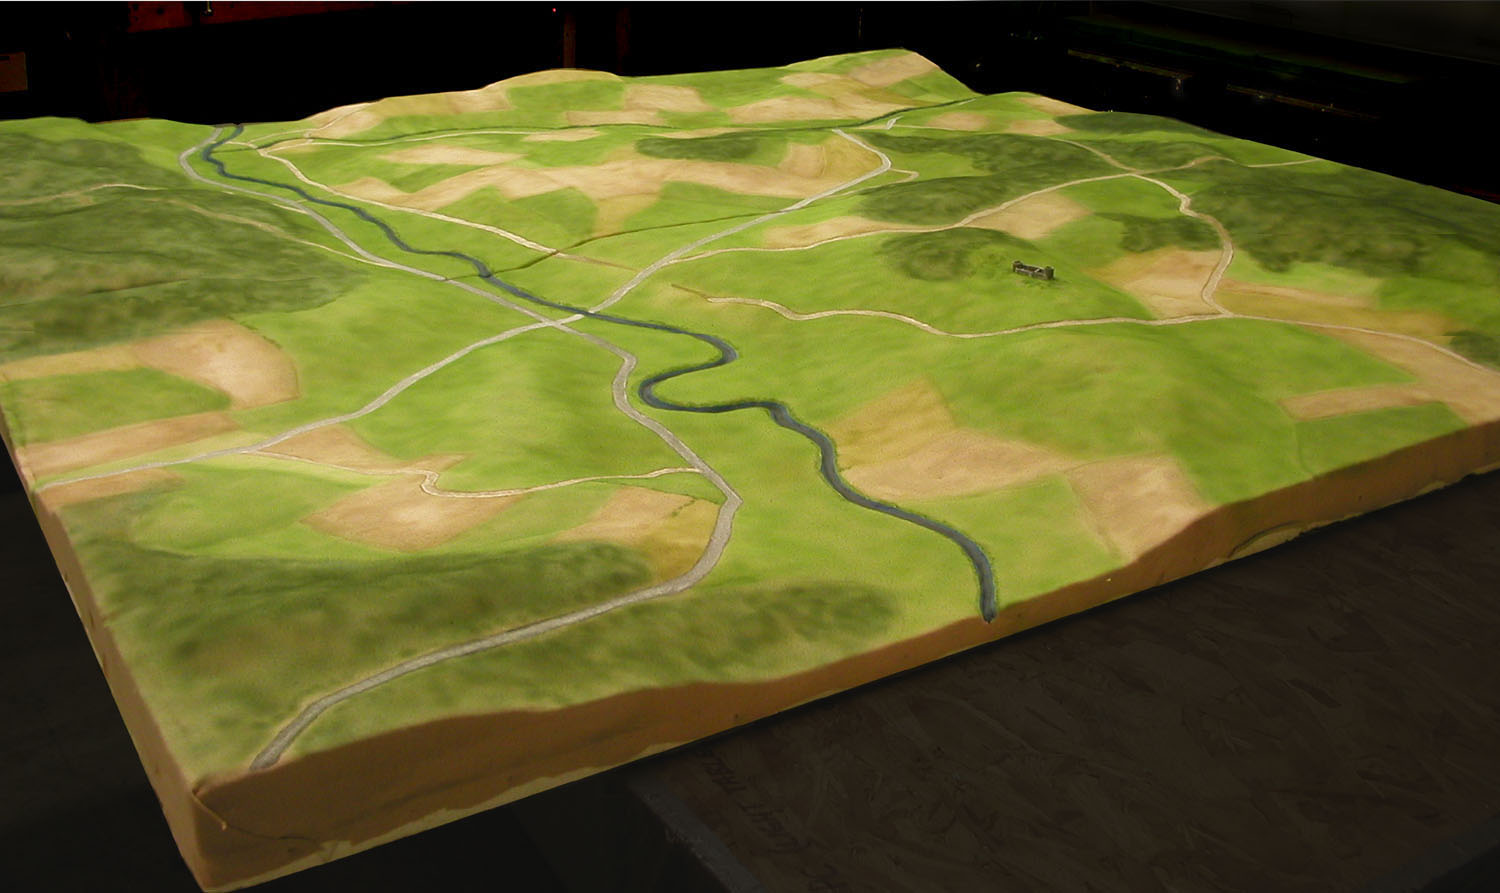
Illo 17&18: The bulk of the surface painting is done with an airbrush, using acrylic hobby paints. Most grassy areas and planted fields receive two or three thin mottled coats of light green paint, with each coat being a slightly different shade than the previous one. The final coat is the darkest, giving some subtle shading to fields, hillsides and (with very light brown paint) fallow fields. Forest areas are more heavily mottled, in several shades of medium and dark green.
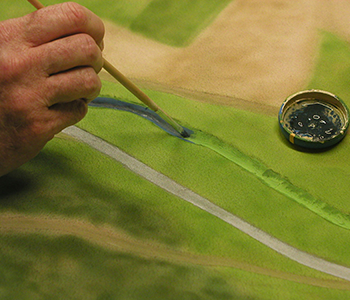
Illo 19&20: Roads, riverbeds, and surface detailing are the last painting to be done before the final phase of construction. This can be as elaborate as you wish, but subtlyrendered features usually make for a better looking board than does a mass of extraneous detail.
Illo 21: The rivers are a resin mixture (available at most art or craft stores) that when cured (usually at least 24-48 hours) will result in a clear, hard surface. Care must be taken to avoid overflowing the spackled riverbeds, as the resin will be readily absorbed into the surrounding countryside!
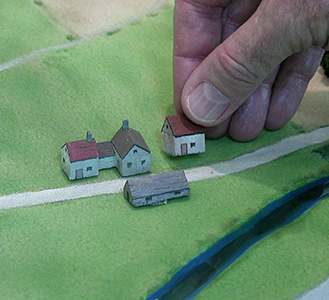
Illo 22&23: All my buildings are made from hobby balsa wood widely available at craft stores. Most are fairly generic, but more elaborate structures can be made if required. Because more buildings are generally better than fewer buildings in this scale, they are slightly smaller than the 1:300 scale figures with which they will be used. I massmanufactured scores of these building by hand, neatly cutting through the fibrous balsa wood with a fine toothed circular saw blade on my Dremel tool. Once glued together, the buildings are painted with hobby acrylics and fine tip marking pens, and affixed to the board by a piece of double-stick tape. This adequately secures them to the fabric board surface despite their light weight, and enables them to be easily removed when the board is no longer needed.
Illo 24: To help the buildings stand realistically upright on sloped surfaces, the Styrofoam can be crushed somewhat by a special stick, leaving a flattened surface upon which the building is affixed.
Illo 25: Small individual trees are made from hobby “foliage” and “foliage clusters” (by Plastruct and Woodland Scenics) impaled on a glue-coated straight pin. The trees are inserted into and removed from the Styrofoam game boards with a pair of forceps to protect the foliage from damage. The cypresses are also based on straight pins, around which a swatch of steel wool (or other suitable material) has been twisted and held in place with epoxy cement. They are then spraypainted dark green.
Illo 26: Larger trees and one-piece “tree lines” are used to delineate the edges of forests. The former consist of small pieces of foam rubber mounted on a long straight pin; the latter are made from strips of foam rubber cut from a sheet of this material (normally sold at fabric shops). The foam rubber “trees” are then roughly shaped by hand, the whole strip usually being from 10 to 20 cm long. Each “tree” in the tree line is coated with contact cement, and covered in hobby flocking material. A long straight pin at each end enables the strip to be quickly stuck into the Styrofoam, as usual. I prefer to leave the interior of the forests defined only by the dark green painted mottling.
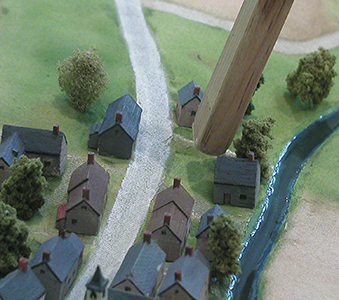
Illos 27, 28, 29&30: Before the trees are inserted in and about towns and farms, some additional green and tan painted details are added around the buildings to suggest gardens and urban foliage. Bridges are made from spare pieces of wood and are held in place by double-stick tape on each end. The seam line between the two board sections can also be discerned, held closely together by the cincture that encircles the board.
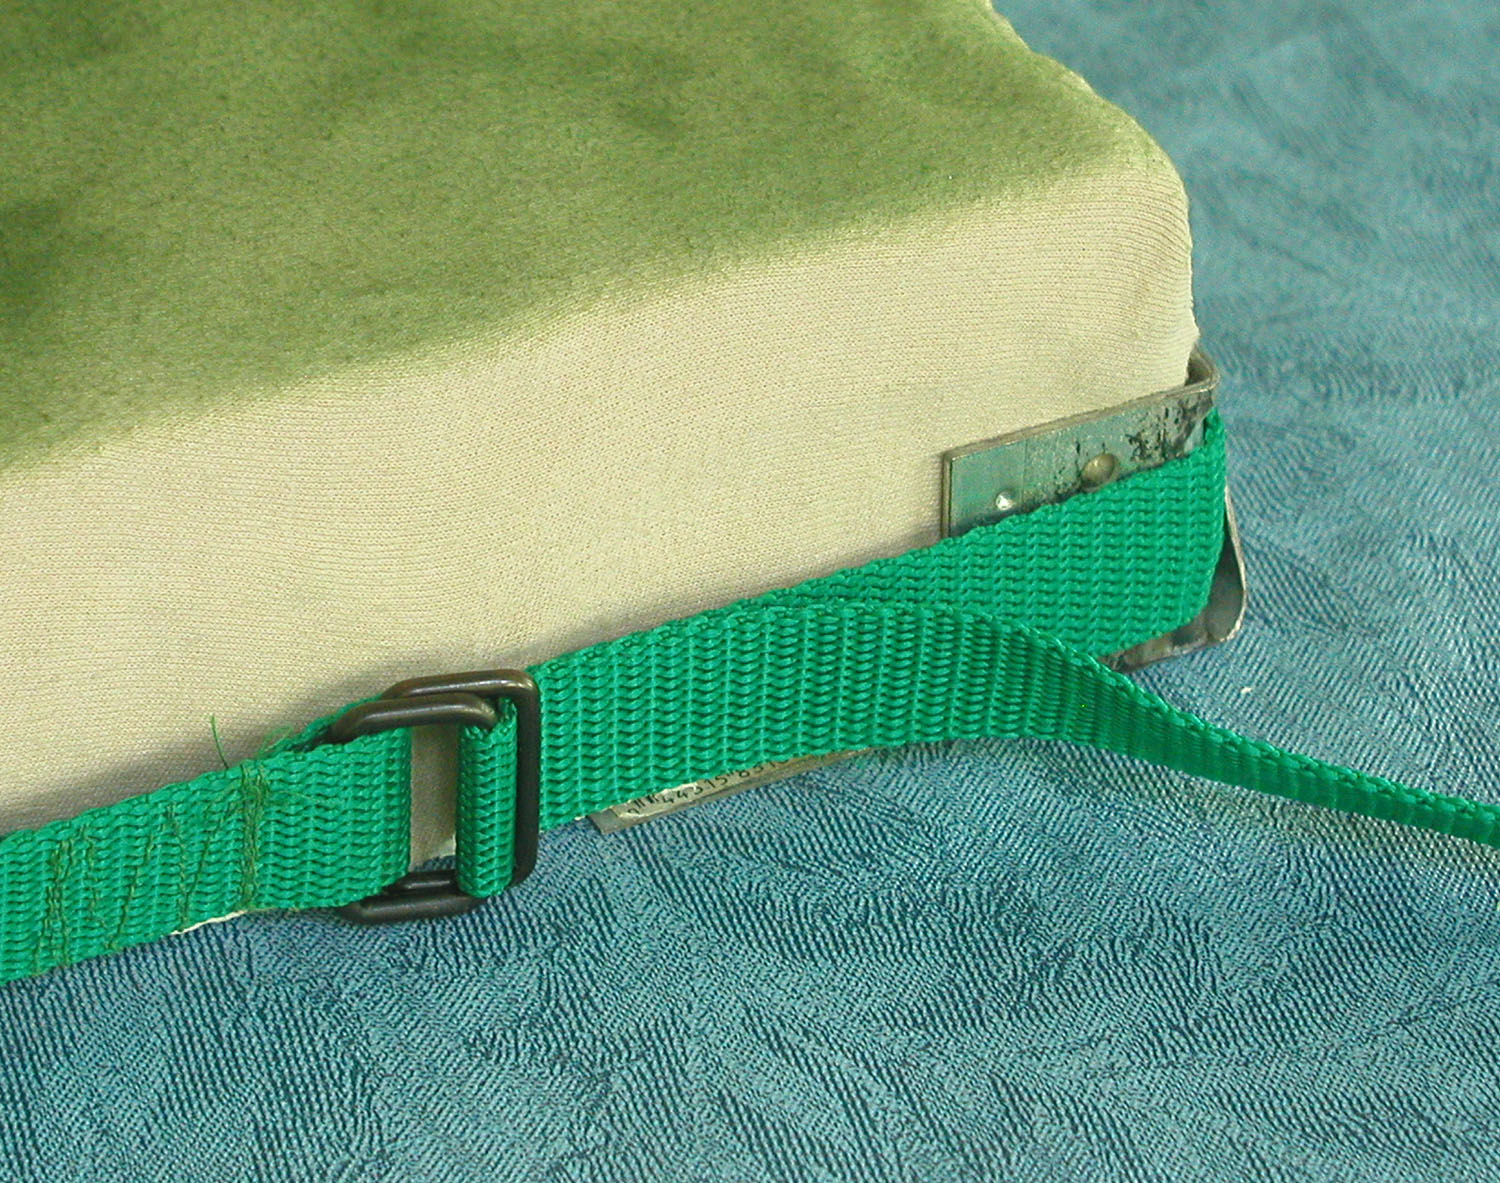
Illo 31: This is a nylon strap that can be tightened around any size board with the simple buckle arrangement shown. A tight fit minimizes the seam(s) between board sections and prevents the boards from shifting out of alignment during the game. The board’s corners are protected by four small “L” shaped pieces of metal.
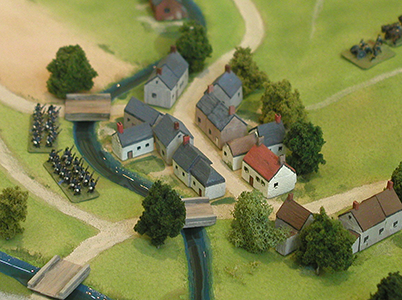
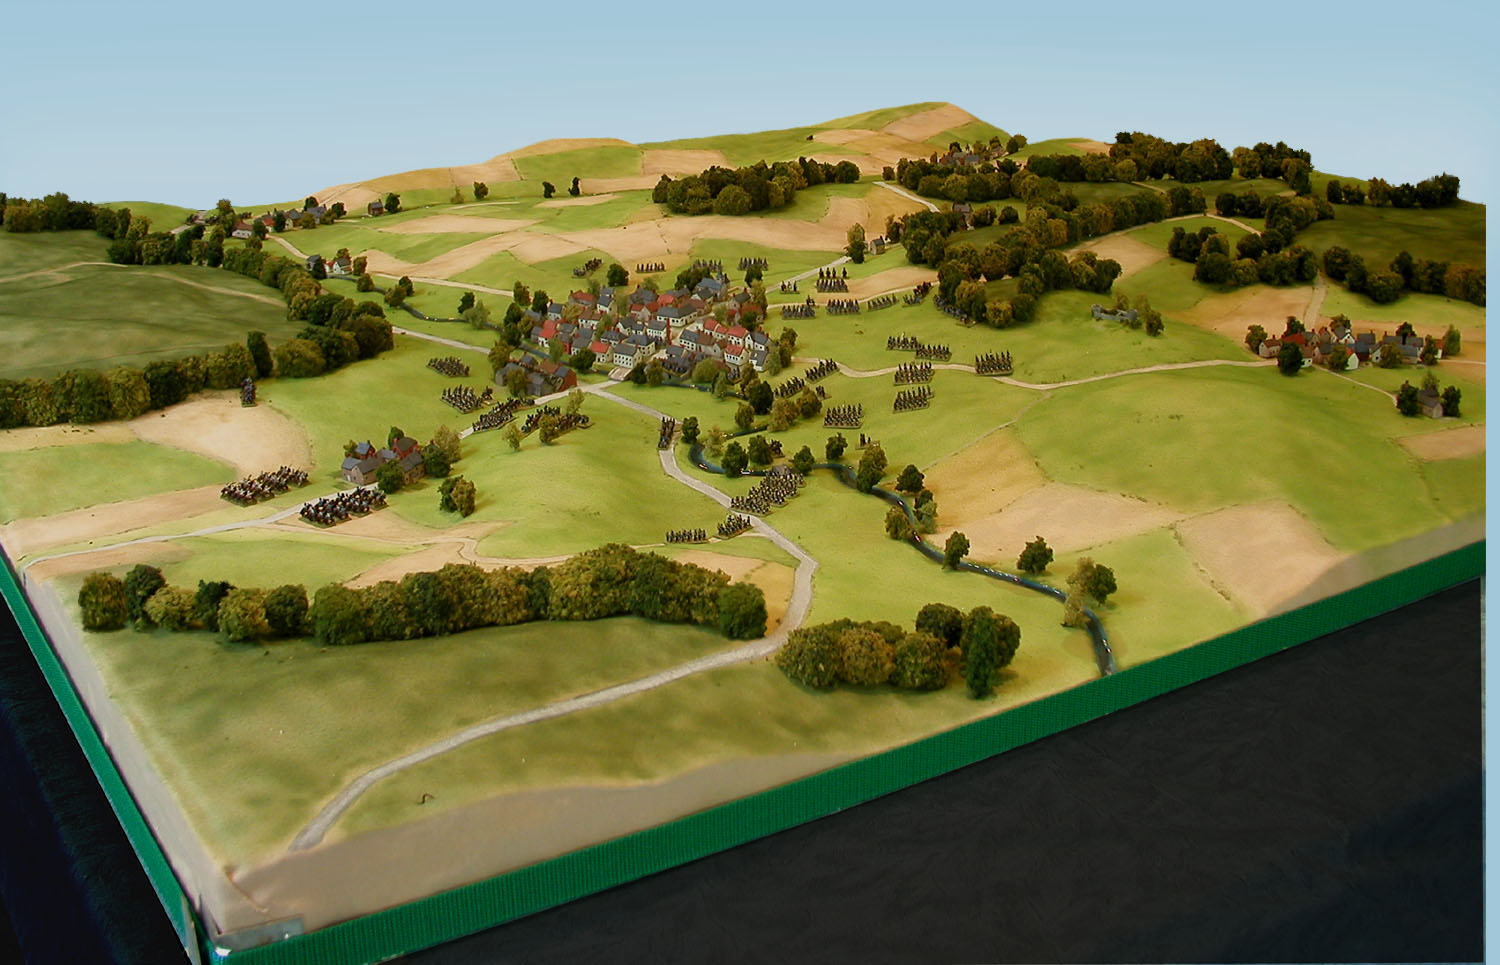
Illos 32-34: The sequence of painting is summarized here, showing the progressive painting of fields and other details. The pins in this case mark which fields are to be left tan, to avoid an unrelievedly green board. The battle of Kissingen refought. The Prussian 13th Division has failed to gain entry to the defended town via the barricaded bridge, but – as was done in 1866 — successfully repaired a partially destroyed foot bridge across the Saale River further south. Six battalions have been thrown across the river, while the defending Bavarian 3rd Division is hastily deploying reserves in an attempt to block them.
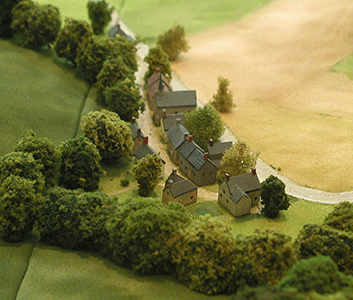
Illo 35: The finished Kissingen Terrain Board by Bruce Weigle.